You can install free WordPress themes directly from the WordPress admin area. But, sometimes you need to install a Pro WordPress theme or a different free theme using a zip file.
This step-by-step tutorial shows you how. And it’s easy.
Here’s how you do it:
Step 1: Download the WordPress Theme’s zip file
- Find the WordPress theme that you’d like to use. We have an awesome collection of WordPress themes, so check them out.
- Once you’ve found the theme you want, download its zip file, and save it to your computer.
- If you’re using Safari for your browser, be sure it doesn’t unzip the file automatically for you. If it does, you’ll need to zip/compress it.
- Go to your download folder and copy the name of the file.
Step 2: Create a Backup and/or staging site (optional) (advanced)
- If you’re just getting started, you don’t need to create a backup or a staging site.
- If you have content you don’t want to lose, back it up with a free WordPress plugin, just in case.
- If you have a medium or high traffic site, I highly recommend testing on a staging site first. This free WordPress plugin is awesome for creating a staging site quickly. When you’re ready to go live, it’s just one click.
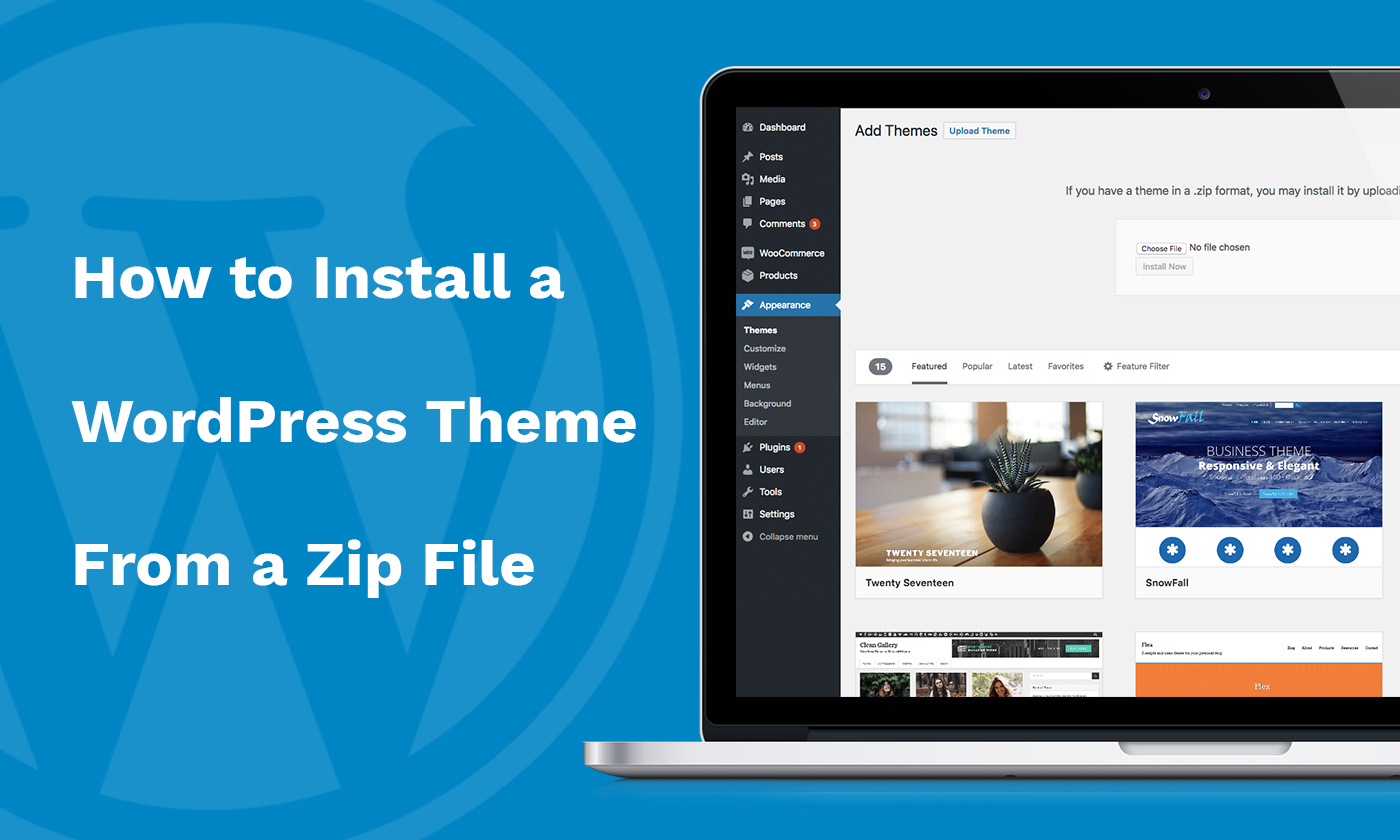
Step 3: Upload the zip file to your WordPress installation
- Log into your wp-admin of your WordPress site.
- Go to Appearance -> Themes in the left menu.
- Use the “Add New” button at the top.
- Since we’re using the zip file, click the “Upload theme” button at the top.
- Select the “Browse…” button.
- Go to your download folder and paste in the name of the file, or just select it with your mouse.
- Click Open, then click the “Install Now” button.
Step 4: Activate the WordPress theme
- You’ll see the “Theme installed successfully” message.
- Below the success message, you’ll see the Activate button. Go ahead and activate it now.
- You’ll be redirected to the theme’s options for configuration.
- If you’re not redirected, or to access it later, go to Appearance -> Customize in the left side menu.
Step 5: Finally, configure the theme.
- Each theme’s options will be different.
- My recommendation is go through each of the theme options without changing anything. That will give you an idea of what’s available.
- Then go through and change the options that are obvious and that you want to use.
- Save now. Why? Because then you can preview the site from the front-end and check what you want to change next.
- If there are any options that you aren’t sure about, consult with the theme’s documentation or support.
- Also, check the documentation to see if the theme comes with any advanced options (like a framework or page builder). We would give you step-by-steps for this, but every WordPress theme is unique. So do a quick glance of your theme’s documentation and double check.
- Tip: Don’t delete your old theme until at least a month later, just in case you need to revert back for whatever reason.
That’s it! Your theme is now installed, activated, and ready for prime-time.